With nkululeko since version 0.58.0, you can predict labels automatically for a given database, and then perhaps use these predictions to check on bias within your data.
One example:
You have a database labeled with smokers/non-smokers. You evaluate a machine learning model, check on the features and find to your astonishment, that the mean pitch is the most important feature to distinguish between smokers and non-smokers, with a very high accuracy.
You suspect foul-play and auto-label the data with a public model predicting biological sex (called gender in Nkululeko).
After a data exploration you see that most of the smokers are female and most of the non-smokers are male.
The machine learning model detected biological sex and not smoking behaviour.
How do you do this?
Firstly, you need to predict labels. In a configuration file, state the annotations you'd like to be added to your data like this:
[DATA]
databases = ['mydata']
mydata = ... # location of the data
mydata.split_strategy = random # not important for this
...
[PREDICT]
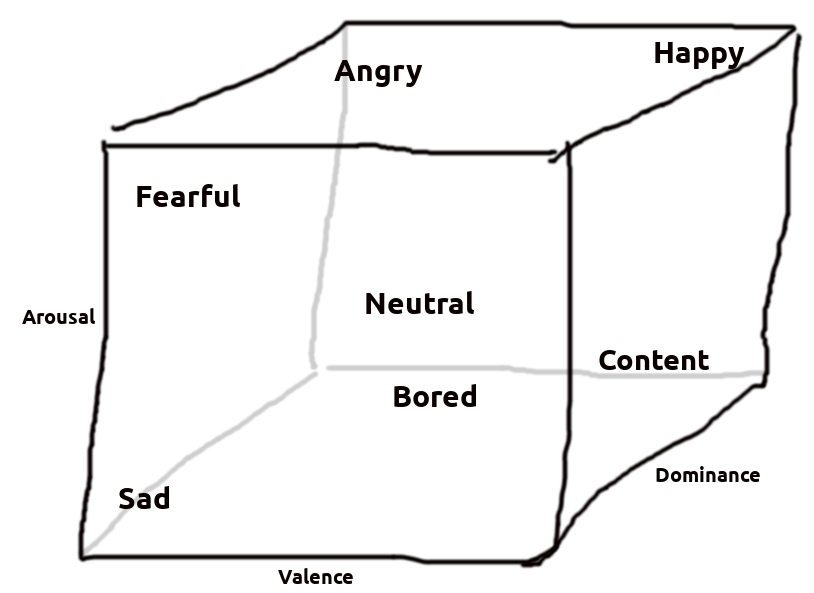
# the label names that should be predicted: possible are: 'gender', 'age', 'snr', 'valence', 'arousal', 'dominance', 'pesq', 'mos'
targets = ['gender']
# the split selection, use "all" for all samples in the database
sample_selection = all
You can then call the predict module with python:
python -m nkululeko.predict --config my_config.ini
The resulting new database file in CSV format will appear in the experiment folder.
The newly predicted values will be named with a trailing _pred, e.g. "gender_pred" for "gender"
You can than configure the explore module to visualize the the correlation between the new labels and the original target:
[DATA]
databases = ['predicted']
predicted = ./my_exp/mydata_predicted.csv
predicted.type = csv
predicted.absolute_path = True
predicted.split_strategy = random
...
[EXPL]
# which labels to investigate in context with target label
value_counts = [['gender_pred']]
# the split selection
sample_selection = all
and then call the explore module:
python -m nkululeko.explore --config my_config.ini
The resulting visualizations are in the image folder of the experiment folder.
Here is an example of the correlation between emotion and estimated PESQ (Perceptual Evaluation of Speech Quality)
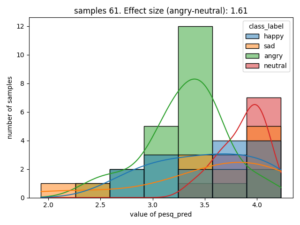
The effect size is stated as Cohen's d, for categories that have the largest value, in this case the difference of estimated speech quality is largest between the categories neutral and angry.